Social media has made everyone’s lives more accessible to each other. We all know who’s doing what, where and with whom. We can see and respond to people’s lives instantly. But, we don’t always have the time and energy for that. With the ease of access people have to your life, it becomes difficult to carve out some time for yourself. This is especially true when it comes to messaging apps or messengers for various social media platforms, such as Facebook. If you have ever come across a situation where you received a message which you wanted to see but not respond to, you know the struggle of what we’re talking about.
![]()
Let’s give you a scenario so you can understand the predicament better, if you don’t already. Let’s say you’re using Facebook and someone you like sends you a message. You’re curious what the message says, but you also don’t want to seem too overly excited and read it the moment you receive the message. You want to wait and show them that you’re busy, and have more important things to worry about. At the same time, you really just want to know what the other person has sent. So, you have two options. You either ignore the message for as long as possible, all the while suffering from the anxiety of not knowing. Or you can read the message and show the person you read it through the dreaded “seen” option.
This option of people being able to see when someone has read their message can be a huge problem, especially for people who just need their space every once in a while and can’t always respond to messages the moment they seem them. If you are one of such people, you may now be asking yourself one very important question; how to turn off “seen” on Facebook Messenger. If you have always wanted to get rid of this pesky little problem of read receipts, you have come to the right place for the solution. But, before we talk about that, you should know a little more about all the read receipts themselves.
What Do All the Facebook Read Receipts Mean?
Before talking about how to turn off “seen” on Facebook Messenger, we need to talk about what all the different read receipts are and mean. These read receipts are designed for one purpose; to let you and your Facebook friends know the status of the messages you send each other. These receipts include:
- Empty blue circle – this empty circle represents that your message is currently in the process of being sent.
- Empty circle with a check mark inside – the check mark within the circle represents that the message has been sent to the other person.
- Full circle with a check mark – this shows that your message has been delivered to the other person and they can open it whenever they want.
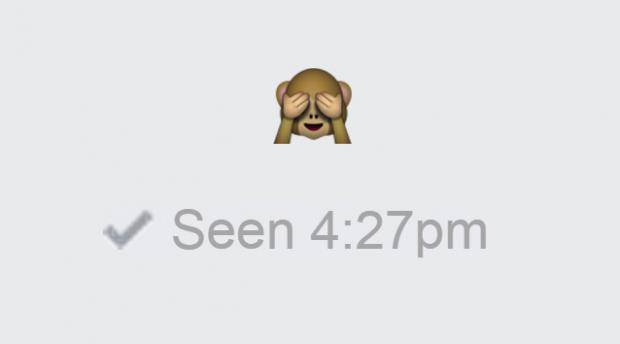
- A tiny version of your friend’s thumbnail – the thumbnail represents that the person you sent the message to has opened and read it.
How to Turn Off “Seen” on Facebook Messenger

Before turning off your read receipts, there is something you should know; it won’t prevent other people from keeping their receipts on. They will still get notifications about your messages just as they normally would. If you turn off read receipts, the only thing that will happen is that you won’t get any notifications about the messages other people send. In fact, Facebook hardly lets you do even that. But, there is something you can do to work around that, especially if you’re using Facebook Messenger on desktop. The Facebook Messenger app on smartphones doesn’t let you turn off read receipts at all, at least not yet.
So, if you really want to know how to turn off “seen” on Facebook Messenger when you use it on desktop, you can follow the below steps:
- First thing you have to do is visit the following URL from your browser: https://apps.facebook.com/unseen-app.
- Here, click on the “Login” option and then click “Continue As (Your Name)”.
- Once you are logged in, you can check your messages without letting anyone know that you have read them.
Next time, whenever you want to view a message without letting the sender know that you have read it, you can simply visit the above website. No more anxiety of wanting to know what a message says and not wanting the person to know you’ve read it. No more awkwardness of coming up with excuses when you read a message and forget to reply for some time. You can view any message you want in secret, without anyone being any wiser.
Other Workarounds for the Read Receipts
If you don’t want to use the above method due to concerns of privacy, there are some other methods you can use to make sure your friends don’t see that you’ve read their message. You can check some of these methods and see which one suits you the best.
- Turn On Notifications – If you’re using the Facebook Messenger app on your phone, you can turn on the notifications for messages you receive. Now, when you receive a message, you can read all or part of it in the notification itself. The only catch is, that the notifications show only a certain amount of characters depending on your operating system.
- Go into Airplane Mode – Simply, turn on your Airplane mode after you receive a message. With the airplane mode on, you can now read the messages without letting your friend know you have read them. Make sure you quit the app completely before turning Airplane mode off again.
- Use a Chrome Extension – There are some extensions on browsers like Chrome that can let you read messages without read receipts. Some of these include “Facebook Chat Privacy” and “Unseen”.
A Little Bit About Facebook

There is not a person in this world that uses internet and doesn’t know about Facebook. Even if they haven’t used it themselves, they have all heard of it or seen someone else use it. The popularity of Facebook is unparalleled by any other social media platform and it continues to increase with more users joining the platform every day. Facebook is a modern day phenomenon, but how and when did it start? What is the story of the website that lets you share your stories with everyone you know?
The story starts at Harvard, where Mark Zuckerberg and his roommates Andrew McCollum, Chris Hughes, Dustin Moskovitz and Eduardo Saverin developed and launched the website on 4th February, 2004. The website was initially limited to the students of Harvard University, but as it gained popularity, the developers opened it to Stanford University, other Ivy League schools, and higher education institutions in the area of Boston. It then started adding support for other university students and eventually for high school students.
Now, Facebook is available throughout the world, except some countries which have blocked the social media website for their own reasons, in 140 languages. Anyone above the age of 13 can create an account on Facebook and the monthly active users range in 2 billion. It still has its headquarters in the United States, in Menlo Park, California with Mark Zuckerberg as the Chairman and CEO, and Sheryl Sandberg as the COO. It has expanded way beyond just one social media platform; the company has bought may other such websites, app and messengers to increase its presence throughout the social media world. The subsidiaries include Messenger, Instagram, WhatsApp, Oculus VR, Wacth, and tbh.
Don’t Have Your Own Facebook Account? Here’s How You Can Get One
Reading all about Facebook and how you can use it for anything and everything you may need, who wouldn’t want to get an account of their own, right? If you don’t already have an account, you may be tempted to make one yourself. If you are, but don’t know where to start, don’t worry, we’re here to help.
- You start by visiting the Facebook website on your computer or mobile phone, through the browser you generally prefer to use. The website can be accessed through the following URL: facebook.com.
- Here, you have to enter your First name, Surname, Mobile number or email address, and a New Password in the fields provided.
- After that, specify your Date of Birth by selecting the Date, Month and Year from the drop-down menus. You need to provide your birth date so that Facebook can optimize the experience according to your age and give you the best of everything.
- Then, specify your gender and click the green button that says “Create an account”.
That’s it, you now have your own Facebook account. You can personalize the account with your own profile picture, a biography, your likes and dislikes, your interests, and anything else that you think is important about you.
Now, after you have created your account, you can log in at any time you want. All you have to do is visit the www.facebook.com link again, enter your Email Address or Phone number and your Password in the fields provided in the upper, right corner of the page and click “Log In”.
