In olden times, Personal Computers were expensive. Mostly because they were newly introduced to the world but mainly because assembling and producing its part was a hard task. However, as times have changed, the prices have gone down. Of course, if you are looking for more advanced computers, you are going to pay more. However, the range of prices has allowed us to buy devices for each individual in the family and in many cases, multiple devices for all members! However, you might also have to share them. We say this because we want you to imagine this- Picture that your young sibling wants to use your device to research for their science project. Now that they have requested you for multiple times by jumping around you, you become annoyed and allow them to access it under supervision. You switch it on and enter your password, making sure it remains a secret. Once your device is ready to use, you click on Google Chrome and let them use it. However, as your sibling types gibberish and hits the enter key hard, there’s an error on the screen. They might panic and you might begin to wonder what just happened? Cursing your sibling might be the right thing to do at that time, thinking they “broke your computer at first attempt!”. But, if you have received an “Err Network Changed” on your device, you will be pleased to know that it is reversible. Here in this thread then, we will briefly inform you what Err Network Changed means, what are the usual causes for this error, and then how to fix Err Network Changed to go back to your activities easily. The situation might depend from person to person but the way to fix is the error is the same!

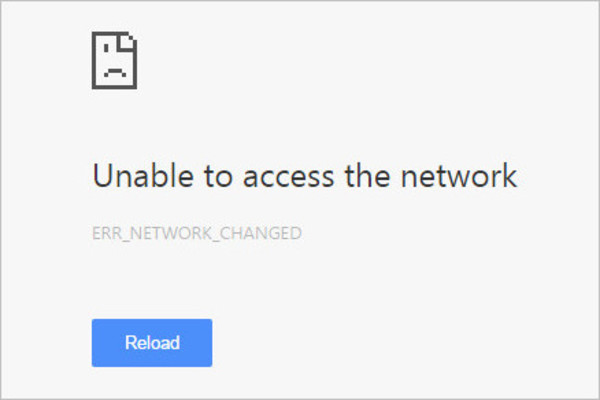
Errors to a Chrome user should come as no surprise, while Chrome is a fast and easy to use browser, it has its downfalls just like many browsers out there that experience the same interruptions. When your screen says “Err Network Changed” it also comes with another message. This message states that Chrome was “Unable to access Network”. Basically, this error means that your browser was working on connecting you to your desired webpage through the DNS, however, due to unknown interruptions your usual connection/network seems to have switched. This error is not related to the hardware of your device and the reasons are easy to comprehend as well. Which is why, we will now begin to help you explore the reasons in the following section before we move forward with how to fix Err Network Changed!
You should know that this error is mainly related to your Internet connectivity and it rarely occurs due to any software interruptions. However, learning the causes is always vital because when you become aware of the culprit behind Chrome and browser related errors, you will be able to understand the fixes that we will provide you with. This way when this error occurs again, you will already be a low key computer genius! Without further discussions then, we are going to begin with our list:

- There’s a probability that this connection changed error occurred due to frequent connecting and then disconnecting activity concerning your Internet connection.
- Connection changed error might have also occurred if you were using any proxy settings. Proxy settings refer to a computer or even a software system that works as a transitional point between a computer/device and another server that that computer wishes to connect to. It processes anything you are trying to access and then proceeds on completing that request. Proxies can exist as a firewall in a device/machine and then it forwards any requests that are screened by the firewall.
- There’s also a possibility that any of the software(s) in your device might have affected your current DNS settings. DNS stands for Domain Name System. In simple terms, DNS in your device is responsible for storing all the URLs that you have visited and helps translate the web address in order for you to connect to it.
- If you are using third party extensions, the error could very likely occur due to that as well.
- Usually, your modem/ router can become overloaded with traffic when multiple individuals are connected and indulging in internet activities. Then, you can experience the Err Connection Changed disturbance as well.

Very quickly then, we will be moving forward to our main focus- How to fix Err Network Changed. In order to fix this error, we have come up with multiple but easy to understand and follow solutions. Because there’s a likelihood that one solution might work for you, and if it does not you will be back to square one- searching for a reliable solution. So, without delay then we will begin with our list of solutions:
- Fix the error by restarting your router/modem.
- Fix the error by tweaking your LAN settings.
- Fix the error by flushing and then resetting your DNS
- Fix the error by resetting your TCP/IP
- Fix the error by running a troubleshoot for your browser
Don’t worry, we will not leave you with words that might sound like nonsense to many of our readers. We will now begin to give you a tutorial for how to fix Err Network Changed using each of the fixes, at the end we will provide you with additional fixes that you can try as well.
How to fix Err Network Changed: Attempt #1!

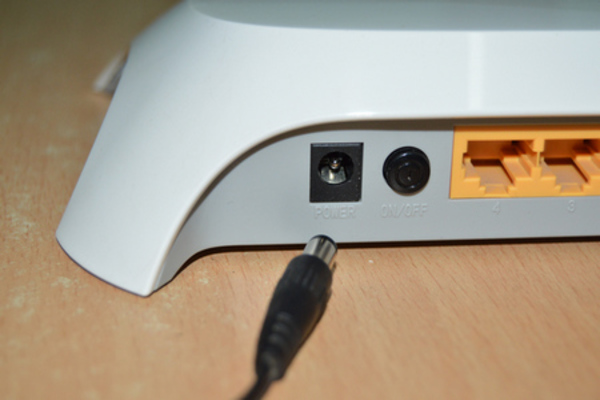
In order to attempt Power Cycle with your router, all you have to do is disconnect or unplug it and make sure it has shut down. We would suggest waiting for at least 5 minutes before restarting it. Once you do that, you can also restart your computer in case. Then to check if the error has been resolved by this very basic technique, try to re-browse the webpage again.
How to fix Err Network Changed: Attempt #2!
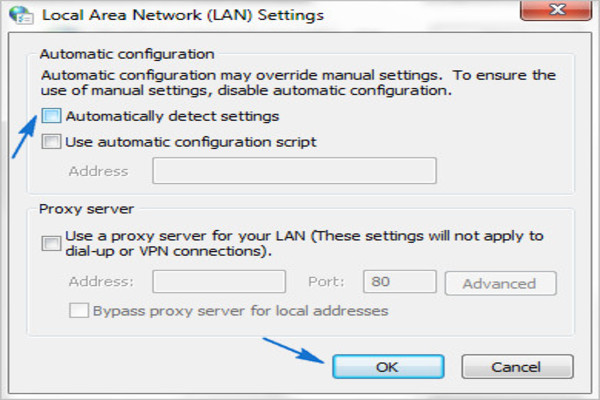
Since your proxy settings might be at fault for blocking your access to the webpage you wish to open, you will remove proxy from your LAN settings. To do that you will:

- Visit your Control Panel from the Start Menu. From the window, open Network and Internet.
- Then, click on Internet Options to open them.
- A new window labelled as Internet Properties will open.
- Click on Connections tab and click on the LAN settings.
- When you access your Local Area Network Settings, you will simply uncheck the box with Use a proxy server for your LAN and check the Automatically Detect Settings box instead.
- All you have to do now is click on Apply and then OK to close the windows.
- Restart your device to make sure the new settings take place and then continue with your activity to ensure that the error has gone.
How to fix Err Network Changed: Attempt #3!

When you will flush your DNS, you will be removing all of your DNS cache that can interrupt with your activities over time because they can become corrupted. To flush DNS then:
- Open your Windows Menu with the Start button. In the search bar type “cmd”
- When you locate cmd.exe in the results, make sure you right click on it and select “Run as Administrator”.
- In the Command Prompt box, just type this command:
- Ipconfig/ flushdns
- Once you hit enter, you will see a success message in the Command Prompt. Just restart your device now and ensure that the error has been solved.
How to fix Err Network Changed: Attempt #4!
Resetting your TCP/IP will also include working with your Command Prompt. In order to attempt this fix then, follow this pattern:
- When you click on your Windows Logo, you will open your Start Menu. From there in the search bar you will look for Command Prompt by typing “cmd”.
- When you right click on it, you will choose to Run as Administrator.
- In the Command Prompt box now, type the following commands but make sure you hit the Enter key after tying each one.
- Netsh int ip set dns
- Netsh winsock reset
- All you are left with now is restarting your device and browsing through your browser to check if the error has gone.
How to fix Err Network Changed: Attempt #5!
If the problem is not related to your internet connection, it is most probably related to the browser itself. Troubleshooting your browser includes:
- Clearing browser history/date
- Reinstalling the browser if required.
- To clear browser history, you will click on Customize and Control. Then select Settings, Under Show Advanced Settings you will find Clear Browsing Data. When a new window opens, check the Cookies and the Cache boxes and hit the Clear Browsing Data button. Try browsing the webpage again after you open your Chrome again. This should help you with your trouble.
- To re-install the browser you are using, all you have to do is go to your Control Panel and uninstall Chrome. Then, open the setup file of Chrome and proceed to installing it again.

If the above mentioned do not work for you, then there’s a slight chance that the URL itself does not operate in your area. In that case then, you can try browsing the same page in Incognito tab of your browse or use a VPN. Hopefully, now that you have understood and learned how to fix Err Network Changed yourself, you can help yourself whenever this occurs again. Here’s to hoping you do not have to encounter the same issue again!

