In this guide today we will guide you on how to create new game centre account on iOS where you will be able to sync all of your best gaming scores, find new competitors and make your overall experience more fun. It is sort of like the Google Play Games for Android devices but remember folks the Google Play was launched after the Game Center was introduced into the market. If you are someone who loves to play multiple games at one time or have more than one game center accounts with many identities then create new game center account for iOS today.

Multiple Game Center Accounts will provide you the opportunity to maintain many villages in the famous game Clash of Clans, access many ID’s in the 8 Ball Pool and much more. There may be instances when you may lose your villages in clash of clans hence it is better to keep more than one Game Center Accounts so that you don’t have to build your progress from day one.
How to create a new game center account on iOS?
If you have been an iOS user and have had any experience with the Game Center Account than the topic of this post may have left you confused because if you see the Game Center on iOS you will notice there isn’t any visible option for logging out which makes it appear as if you cannot own more than one account for Game Center. Let’s clarify this confusion today.
- First thing you need to do is see that you aren’t signed in to any previous Game Center Account you own which probably you are logged in to so first thing you have to do is sign out of your Game Center Account.
- Go to the Settings section of your iDevice and then visit the section for iCloud.
- Here you must find and click the button for Sign Out. If you see that your iPhone is in the ON position then you will be asked to enter your password or pass code.
- When you have successfully signed out of the iCloud, visit the settings section for the game and you will find that your Apple ID is in the list on the next page.
- Simply click on the Apple ID and a pop up window will instantly appear. Simply click the button which says Sign Out and you will have successfully logged out of the Game Center Account.
- Once you have signed out of the last Game Center Account, click the Home Button and open the Game Center.
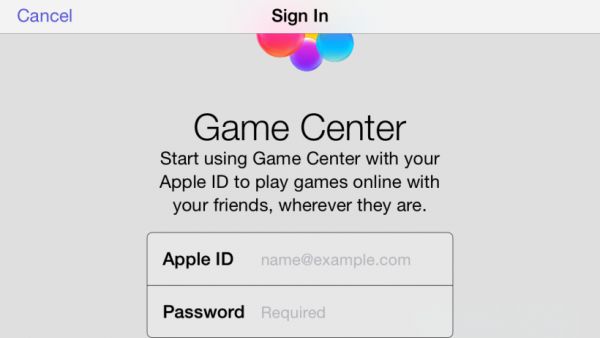
- Now click the option for a new Apple ID and begin registering for a new Game Center Account for which you will have to give a valid email address. You must use the email ID that is not registered with Apple ID before.
- Then choose your country of residence, state your complete name and address plus other asked details.
- If you wish to register for an Apple ID without having to give the credit card number then you may have to adopt a different route.

- When you are done registering for a new Apple ID. You can open up any of the installed games on your iDevice and simply begin enjoying the game using your new game center account on iOS.
If you have been successful following this guide on how to create a new game center account on iOS then you must share it with your social circle so that they can benefit as well.
How to logout of the game center account on iOS?
- Launch the Settings section open on your iPhone or iPad.
- Scroll a little below to find the ‘Game Center’ then click on it.
- Now hit the option for ‘Apple ID’ and here you must click the option for ‘Sign Out’.
- You are good to go.
The logging out process sis very simple however if you wish to enjoy playing multiple games that needs you to stay logged in to the game center account and you don’t wish to lose your notifications then follow the guide beneath.
- Go to Settings and navigate to the section for ‘Notifications’.
- Scroll beneath to locate the section for ‘Game Center’.
- Here you must switch off the ‘Allow Notifications’ by toggling with the slider.
That is it for this post today folks, we hope that this helped enhance your gaming experience in the Game Center for iOS. Don’t forget to leave your comments in the box below.
